 I’ve had requests to blog about useful Gmail tips and tricks. There are enough I could string this out over weeks. I won’t.
If there’s too much information to digest in one sitting, I suggest taking a tip or two, play with them, and come back later for the rest.
So, without further ado…
Patti’s Pathways presents:

GMAIL TIP 1:
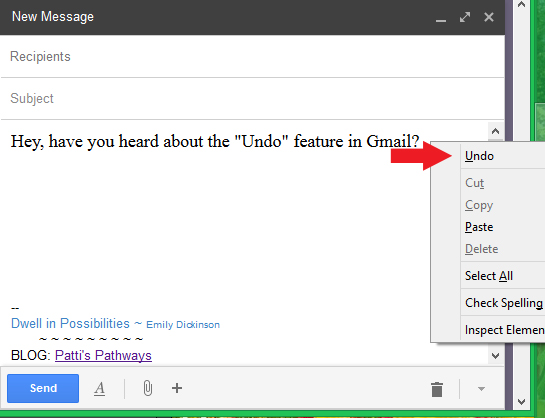
The Undo Command
We’ve all done it. Typed so fast we’ve enabled hotkeys which highlight an epistle we are preparing and we type over it. Fear not! Things are not as dire as they seem.
One of the best tricks in Gmail is the ability to “undo” a deletion in an email. The Undo command will flip back through your recent activity, including the highlight and the deletion.
To reclaim your epistle, simply right-click in the body of your message.
TIP 2:
Gmail Groups
Send frequent emails about the same thing to the same people? Set them as a Gmail group.
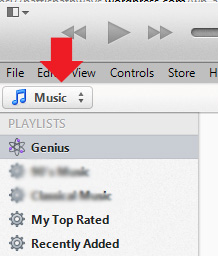
1) Open Contacts (upper left margin).
 FYI: If Contacts won’t open — there’s a perpetual message of Loading… -or- Still Working… — clear your browser history and/or cookies.
I know. I know. Clearing cookies is a pain in the patootie. Now you have to re-enter all your passwords, but cleaning periodically may be a good thing. Find tips about passwords in my previous blog “Creating the Safest Password” (June 2014).
2) Select New Group at the bottom of the right margin.

This opens a box asking you to name your new group.
I’ll name this one “TEST”.
You’re thinking, Thank you, Captain Obvious.
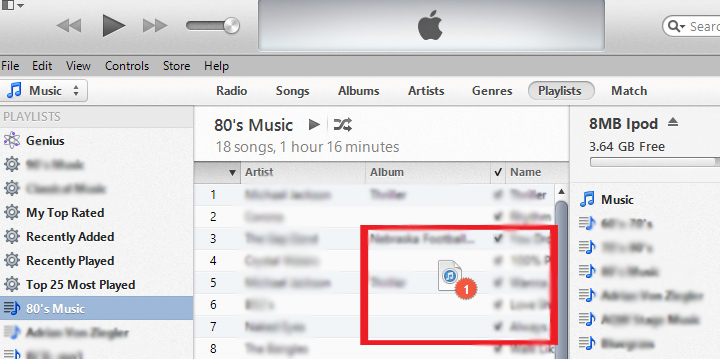
3) Click your new group name (Arrow 1), then click the Add icon (Arrow 2), type the first letter of the contact names you want to add to that group. Gmail will autofill your contact names.

4) Click Add at the bottom of the group name window and Presto! You’ve added a new contact group.
FYI: To get back to Gmail, go to the top left margin menu again. (Tip 2, Example 1)
TIP 3:
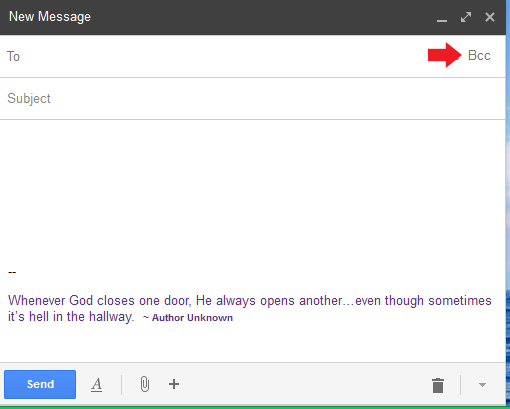
Blind Carbon Copy
Ever receive an email with fifty or more addresses in the To: field? Not cool, huh?
To make your bulk emailing polite and political correct, use Blind Carbon Copy or BCC.
1) Put your email address in the To: field. Yes, you’ll get a copy in your Inbox, but look at the bright side. It won’t be notes from others criticizing your email etiquette.
2) Click BCC: at the right of your message compose box. Now add your recipients behind the BCC.

3) Type and send your email as usual.
The receiver will see their name in the To: field and yours in the From: field.
Tip 4:
Replying Without Including Every Thread Comment
Let’s talk about the punishment of viewing every single message in a long reply thread.
Yes, you can stop this. Never knew you had the power, did you?
Unfortunately, there’s no setting in Gmail to turn off every reply in a thread. But…there are workarounds.
Workaround 1:
- After 1) clicking Reply, 2) press Ctrl + A and 3) simply start typing.
Ctrl + A is a shortcut for “highlight all” (A = all). This deletes the string of thread messages in the body of your reply and keeps only what you now type.
Workaround 2:
- Enable Quote Selected Text lab.
Whispers: “We’ll talk more about labs later”.

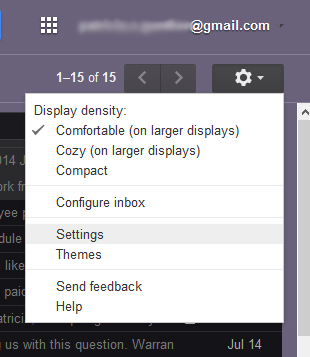
1) Click the gear icon in the top right corner of your email window.
2) Go to Gmail Settings.

3) Click Labs tab
Now you should see all the fun Lab options, or as Google calls them “crazy experimental stuff”. Don’t be scared.
We’re looking for this lab. Scroll down to it and enable.
USING THIS LAB: highlight text you wish to reference in the message you’re replying to, select Reply, and your highlighted selection should magically appear in the body of your reply message. You can then type and reference it.
Workaround 3:
- Turn off Conversation View.
Remember eons ago when your email box didn’t have threads? Yeah, me neither. Trust me. There was a time. You saw every message as an individual email. This was before Conversation View, which groups conversations together by topic. Turning off CV will only include two emails in your reply —the original email and your reply. Personally, I like CV better —less clutter on a long conversation — but if you don’t, you can turn off Conversation View in a few clicks.
1) Open Gmail Settings (gear at the top right)
2) Under the General tab, about one-third of the way down the page is your Conversation View settings. You can turn them off or on by clicking the appropriate radio button, then saving at the bottom of the page. 
TIP 5:
Task/To-Do List
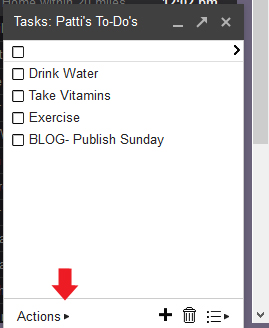
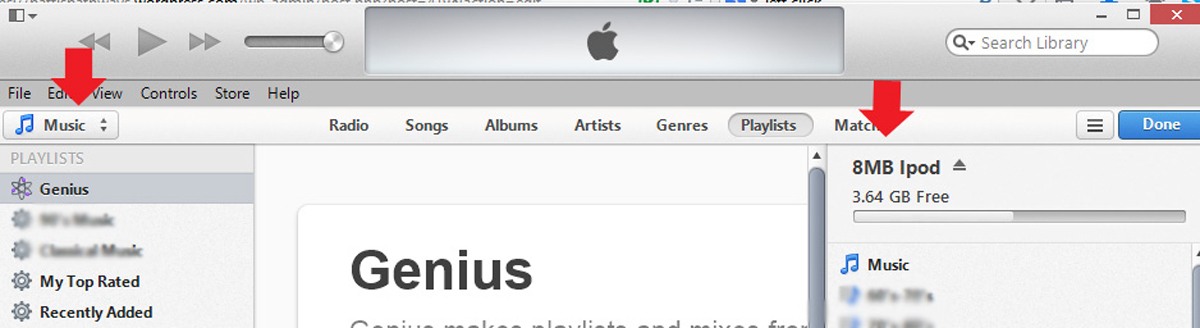
Did you know Gmail had a Task/To-Do list? Yep, it does. Where? Here.
1) Remember the Contacts list (top left) we looked up before? The Tasks option is directly underneath it.

2) When you click Tasks, you’ll see this. Well, kind of. You still need to input your personal To-do’s.

Gmail will remember your list eternally. Yes, even if you click the X at the top right of the box or log off. You have to manually remove your items through the Actions menu (arrow).
TIP 6:
Desktop Email Notification
A few years ago I purchased a program called Gmail Notifier Pro. It tosses a notice on the lower right corner of my desktop when I receive a new email. It does this for all my email addresses (I have several and I’ve set each to a different color). I love it.
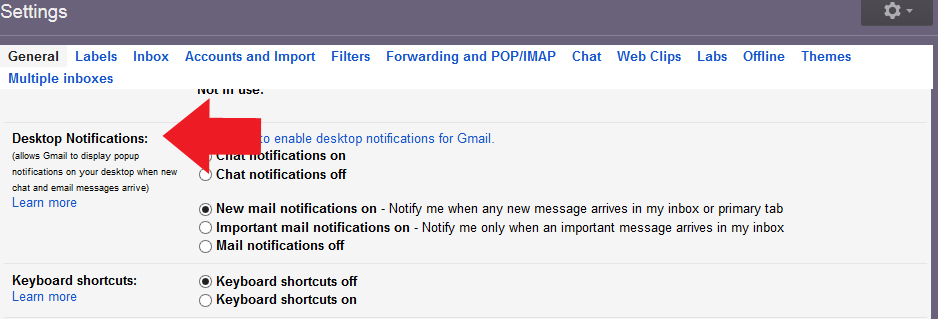
Gmail now offers a version of this free…free…free. If you’d like to try it, here’s where to find it.
- Open Settings (top right)
- Scroll down to Desktop Notifications and click the radio button in front of New Mail Notifications On.

Notice the middle option: Important mail notification on? As far as I know Gmail decides what’s important and what’s not. I suggest setting to notify on all new emails, and you decide what’s important.
FYI: It will not notify you of Spam, but it will notify you of promotions you’ve signed up to receive.
More Talk About LABS:

Not that kind of lab, silly.
Good dog.
What is a Gmail Lab?
These are pre-releases Google is letting you use… for now. Can you say guinea pig?
Their disclaimer reads: “If you’re going to brave the Labs world, it’s important to keep the following things in mind about these features:
- They may break at any time.
- They may disappear temporarily or permanently.
- They may work so well that they graduate and become regular features.”

I think Gmail labs are wonderful things. They can be very helpful and are easy to equip. If you see one you want to try, simply click Enable, then Save Changes.
Here are a few I’d recommend.
Great Lab 1:
- Undo Send – This gives you an option to unsend an email.
If you’ve ever hit Send and thought, “Oh, dang. That wasn’t what I meant to say.” – or- “Oops, forgot to say that.”, this lab is for you.
After it’s Enabled and Saved, your Undo Send lab will give you an option after each email to Undo it.
When you click Undo, it brings your email back so you can add, delete, or whatever you’d like to do with the original.
NOTE: The default setting for Undo Send is 10 seconds. I changed mine to the maximum — 30 seconds — by going to Settings > General tab, then about 1/4 of the way down the page.
ADDITIONAL CAUTION: The max is only 30 seconds. If you sent a harsh email to the guy who stood you up or to your bff about her failure to tell you she’s dating your ex, there’s probably not enough time to Undo those.
Moral of this: Think — and calm down — before you email. Makes life easier.
Great Lab 2:
If you re-send the same something over and over, this is the lab for you.
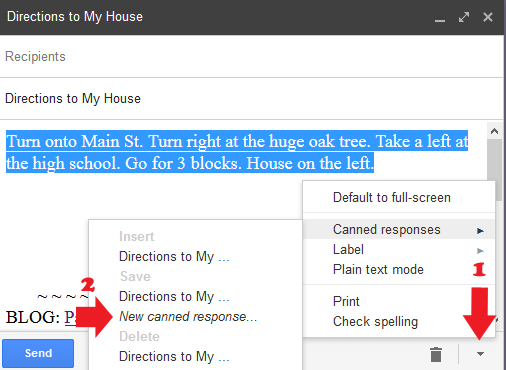
To use it, type in your email compose box, then highlight it.
Here’s the tricky part: Click at the bottom right of your email window (arrow 1), click on Canned Response, and New Canned Response (arrow 2).

You’ll get a window that asks you to name your new canned response. I named mine Directions to My House. Of course.
Those are my favorite Gmail Labs. Yours may be different from mine. Check out the entire list. Oh, and if you want to keep up with old or new Gmail labs, visit Gmail’s blog: Official Gmail Blog
ADDED COOL INFO:
I found this blog on utilizing your Gmail as a business/organizational tool. I don’t know the author, but I appreciate the time it took to put the blog together. Great article. Thanks, Most Epic Stuff! 13 Simple Hacks You Should Know About Gmail

Remember, there’s a lot here to let sink in. Take your time, and play with some of my recommendations.
I think you’ll find one, maybe more, that’ll make your correspondence life easier.
Take care… and thanks for following Patti’s Pathways. 😀
DISCLAIMER: Any and all ideas presented in this blog are solely my own unless otherwise noted. I experience troubles with technology just like any other person, and if I stumble upon a fix or suggestion I feel could benefit others I pass it along. At no time, have I suggested or implied that I hold any degrees or certificates related to computer repair.
I have during my career assembled parts into working computers; done troubleshooting on hardware and software; utilized a great many computer programs and software; designed and updated websites and blogs; as well as created brochures, banners, and flyers.


 1) Take large-sized letter envelopes.
 day or special occasion, split your gift in two.
 ber when (and how often) your parents use to say, “Money doesn’t grow on trees.” You probably learned that the hard way after you got your first paycheck.
 allowance for bad deeds, but don’t. Yes, I wanted to say dirty deeds done dirt cheap, but I refrained. 😉
